
How to make an AmyOrangeJuice
Wine Cork Notice Board
Wine Cork Notice Board
Published in our June 2010 Issue
Written by Amy from AmyOrangeJuice
I have been making these for a few years now and they go down very well as
presents for the blokes in my life! So if you want to give your Dad something to
stick pins in this Father’s day, this may be just the thing!
This is a very simple project to do and looks really effective. The whole thing only took me an hour or so (with sometime for a cup of tea while the paint dried).
 You will need:
Lots of old cork wine corks (the plastic ones are no good).
You will need:
Lots of old cork wine corks (the plastic ones are no good). I got a huge amount from the local Scrap Store in Exeter, but you could ask your friends or the local pub/restaurant to save some for you. My friends are always turning up with small bags of corks for me and every time I have a big enough stash I make a new board!
Strong Glue, undiluted PVA will be fine
Sand paper
A small hacksaw
An old picture frame, the size you require
Paint or spray paint
Step 1
 Remove the glass
from your old picture frame, and recycle the glass. You need the stiff backing to stick the corks
onto and the frame itself will give a good edge for the corks and is the secret
to keeping it straight and giving a professional finish.
Remove the glass
from your old picture frame, and recycle the glass. You need the stiff backing to stick the corks
onto and the frame itself will give a good edge for the corks and is the secret
to keeping it straight and giving a professional finish.
Step 2
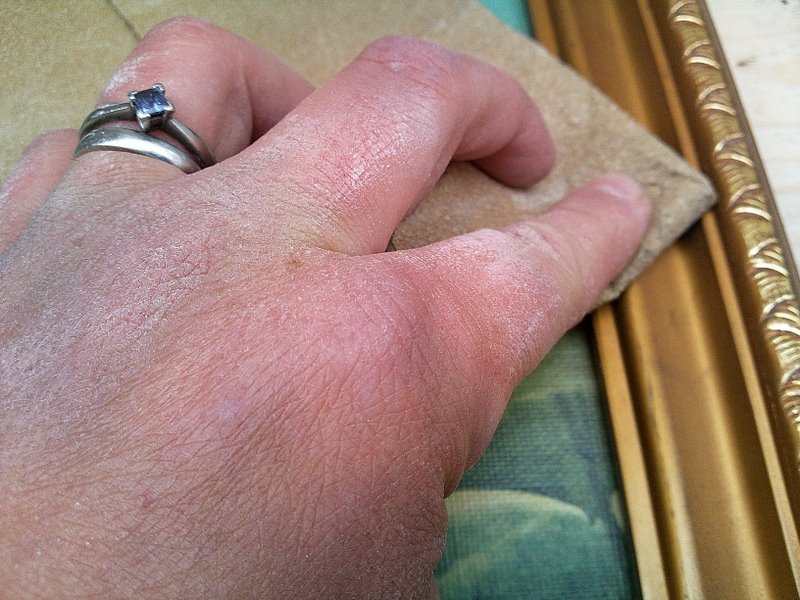 Quickly sand down
the frame so that the paint has a rough surface to get more adhesion to; this a
couple of minutes will do the trick, just to rough up the surface of the frame.
Quickly sand down
the frame so that the paint has a rough surface to get more adhesion to; this a
couple of minutes will do the trick, just to rough up the surface of the frame.
Step 3

Paint the picture
frame and leave to dry. It doesn’t matter if you get paint on the backing as
the corks will cover this. I used the left overs of a tester pot of emulsion
paint mixed with a little PVA glue to give it a better purchase on the wooden
frame.
Step 4
 Stick your corks
down in neat rows, or make a pattern with them, as you wish. Push the first row
right up to the edge of the frame and keep the rows tight without gaps. If you have some bigger corks cut them down
with the hacksaw so that the corks are a uniform size. If at the end of the row
there is a gap which is less than the size of the corks, again cut them down to
fit the gap. And just keep building up the rows. Cork cuts quite easily with a
hacksaw, just remember to hold it firmly (or if you have a vice use that) and
keep your fingers out of the way. My Dad’s top tip for sawing things: is to let
the saw do the work, just make a gentle constant action and don’t push down on
the blade. He is right, works a treat!
Stick your corks
down in neat rows, or make a pattern with them, as you wish. Push the first row
right up to the edge of the frame and keep the rows tight without gaps. If you have some bigger corks cut them down
with the hacksaw so that the corks are a uniform size. If at the end of the row
there is a gap which is less than the size of the corks, again cut them down to
fit the gap. And just keep building up the rows. Cork cuts quite easily with a
hacksaw, just remember to hold it firmly (or if you have a vice use that) and
keep your fingers out of the way. My Dad’s top tip for sawing things: is to let
the saw do the work, just make a gentle constant action and don’t push down on
the blade. He is right, works a treat!
Step 5
Let the glue dry and
then get the drawing pins out!

To personalise the
board as a great gift pin some special treats to the board, some tickets to a
special event, some lovely photos, some packets of seeds or some specialty tea
bags that come in their own little paper envelopes. Or do what I have done and
hang it in your house! Mine is in the Kitchen.

1 comment:
Great tutorial! I've often thought of making one, maybe I should give it a go... Vic:)
Post a Comment