The 'Original' Creative Crafting Magazine written by Crafters, for Crafters

Creative Crafting magazine began in August/September 2009, when a group of crafting friends on the Creative Connections network decided that it would be a good idea to raise awareness of the crafting community. From this point they started work and the first issue of Creative Crafting was published in October 2009 and the last was June 2014.
Now we are bringing you everything crafty from the home and beyond.

Thursday 29 November 2012

Mocha Sticks with Chocolate & Chocolate Walnut Kisses


Published in Issue 20, December 2012
Written by Silvia from Slowlane Handmade

Mocha Sticks with Chocolate 
& Chocolate Walnut Kisses


Christmas is around the corner and and thoughts turn to gift giving and feeding the family. 

The economic downturn is also taking it’s toll and perhaps you feel that you need to cut your Christmas gift giving list. But you don’t really have to!! 

Why not give home made, home baked gifts? And try something a little different. 

These little biscuits, wrapped with love will be such a hit that your loved ones will want them all year round.


Mocha Sticks with Chocolate


Ingredients

4tbsp Espresso powder
275gr Flour
50gr ground Almonds
50gr ground Hazelnuts
75gr Sugar
10gr Vanillin Sugar
2 ½ tsp Cocoa Powder
Pinch of Slat
2 Egg yolks
200gr Butter
200gr dark chocolate
Cling Film
Greaseproof Paper

Line 3 baking trays with greaseproof paper.

Dissolve the espresso powder in 2 tbsps hot water. Mix flour, almonds, hazelnuts, sugar, vanillin sugar, 2tsp cocoa powder, salt, egg yolk, espresso and butter to a smooth pliable dough. I use my Food mixer with the dough hook for this. Form dough it into a thick roll, wrap in cling film and set it aside in the fridge for 1 hour.

Cut your dough roll into 8 pieces. Roll out each piece into 42 cm long rolls (about 1 cm thick) cut into 7 smaller rolls.

Bake for 11 – 13 minutes at Gas mark 3 or 200 degrees.

Melt your dark chocolate and cover each end of the Mocha sticks.


Chocolate Walnut Kisses


Ingredients
300gr Flour
325gr Sugar (125gr for main dough the rest for the meringue)
10gr Vanillin Sugar
Pinch of salt
20 gr cocoa powder
1 Egg
150gr Butter
ca 120gr Walnut halves
4 Egg whites
2 tsp. Lemon juice
Cling Film
Greaseproof Paper

Line your baking trays with greaseproof paper

Mix flour, 125 gr sugar, vanillin sugar, sugar, salt, cocoa, egg and butter to pliable dough. I use my food mixer with the dough hook for this. Wrap in Cling film and set aside in the fridge for 45 minutes.

Roll out the dough approximately 3mm thick on a floured work surface. Use a small circular biscuit cutter (4 cm) and cut out your shapes. You should get approximately 78 little circles.

Mix your egg whites until they form peaks, add the lemon juice and slowly add the sugar, keep mixing all the time. Keep mixing until the ‘snow’ has a shiny look to it.

Use a piping bag to add the egg snow onto your bases. Add a walnut half and bake at Gas 2 /175 degrees for 12-15 minutes. You want the snow to be firm but still white.

Sadly this will be the last of the Recipes from the SlowLane. I have enjoyed my time with Creative Crafting Magazine and I hope you have enjoyed my Recipes.

A bit of sparkle to unite the generations

Published in Issue 20, December 2012
Written by Kirsty from The Litte Floating Craft Co

One of my earliest memories is of my mum sitting very patiently with my big brother and me helping us make decorations for the family Christmas tree. I remember cutting down egg boxes, dipping the edge in glue and glitter, making a chime from an old matchstick, also dipped in glue and glitter and finally joining the two together with thread to form a bright, sparkly bell. We made paper chains, we made cards for our grandparents; we got stuck in and we had a great time!
In this current revival of the make do and mend ethos and with homemade crafts being absolutely on trend, it’s a fantastic time to encourage your family to sit down together and create some memories to be kept in the Christmas decorations box for many years. I think this should be an uncomplicated adventure that both little and big hands can enjoy, without fiddly techniques or a frustrating need for an adult to do too much to help.

With this in mind I designed these three decorations. All are formed from cheap polystyrene balls which are readily available from craft stores, DIY shops, good old Ebay and I have used a variety of sizes as it’s always good to have big decorations for the bottom layers of the tree, and teeny ones for the top!


The hangers: Take a length of ribbon or cotton tape no more than 15cm long and two pins. Secure one end of the ribbon using one of your pins, pushing it into the polystyrene as far as it will go and then nestle the other end of the ribbon as close as you can get it and pin into position with your other pin. Use pearl headed pins or look online for florist pins which come with all kinds of tops such as pearls, diamante in different colours, even little flowers!


Print, pins & buttons: The largest bauble is covered with disks of paper cut from an abandoned and useless old book. The bauble has been slightly dented in the palm of my hand using a fingertip and then a pretty pearl headed pin is pushed through an old button, through the paper and into the polystyrene ball. Be sure that your ball has a wider diameter than the length of your pins to avoid any sore fingers! 
Cover the ball in these disks completely. I have sprayed the bauble with a little silver glitter spray to add some sparkle when it’s on the tree near the lights.

Glittery pink print: this small bauble is the most simple of all three, and is just covered with torn scraps of old book pages that have been covered in basic school PVA glue and arranged over the surface, being sure to overlap. I sprayed a little pale pink ink over randomly to add interest and once it was dry I used my fingers and covered the whole bauble in glitter glue.

Vintage buttons and glitter: this button-ie bauble was the most complicated of the three, but only because the glue takes a little while to dry! If an adult is making this one then I’d recommend using a hot glue gun to attach the vintage buttons all over the surface of the polystyrene but if this is a family affair then a little patience and regular glue must be the way forward. Once the glue had dried a little I went over the bauble with my glitter glue, filling in the gaps and gently dabbing with my finger to smooth it around a little so we have an almost solid surface.

These would look great hung on a family Christmas tree and are simple to produce. Why not encourage your kids to write their name on a glittery print bauble and attach it to their Christmas stocking to make sure that the big man gets the right one? Or make one for their Grandma or Grandad? It would look so special with a fab drawing rolled up into a scroll and the bauble attached with a thick strand of ribbon tied with a bow! If you’re into gift wrapping with style then a bauble, ribbon and a sprig of greenery would look amazing,
The possibilities are endless so I really hope you enjoy making your baubles!

The Rise and Rise of Wow Thank You


Published in Issue 20, December 2012
Written by Tracey from WowThankYou


The Rise and Rise of Wow Thank You

Let’s start by going back in time – to 2009 in fact. I was feeling particularly sorry for myself during that summer as a massive writing contract had been discontinued through no fault of my own and I was licking my wounds. Working as a freelance writer had its perks (working around the demands of my young children for one thing), but I’d had enough of working short-term assignments, not knowing if I’d find the next one. I still wanted to be my own boss, but the time had come to look to pastures new.

The eureka moment occurred during autumn 2009 when, over a coffee with a friend, we jointly decided that it would be good fun to set up a competitor website to – well – the ‘other’ marketplace we all know. So we set about designing a website and deciding on terms that would make us favourable – the key to this being lower commission rates and increased advertising. We signed up a graphic designer friend to put the website together, and we thought we had it all covered … hmmm


Version 1 of WowThankYou was launched in the early hours of 5 March 2010. The week leading up to the launch was so hectic – we converted our dining room into a multi-laptop office; the four of us, myself and Huw (husband), Georgena and her husband Steve, worked in shifts – loading products and looking after our four young children, and when the website finally went live, we stood outside the house and popped the cork on a bottle of champagne (that in honesty we were too tired to drink! – I can’t actually remember sleeping during that time!) It was a lot of fun though. Launch day was my mum’s 71st birthday and we spent the day at the zoo with my children, and my friend and her children. It was a nice day out – though tense, as we wondered how well the site would be received. Before that week had ended, we realised that the website was not remotely user friendly – we had to load  all the products ourselves because of the complexity of the system. We persevered anyway and although we did ok, we certainly didn’t strike any kind of fear into our competition! Alas the workload became too much for my business partner, and we went our separate ways, leaving me with a website that certainly couldn’t be managed singlehandedly. So I was faced with a ‘do or die’ situation – throw everything I had into it, or walk away. Not one to shirk away from a challenge, I cashed in my savings account and took on a top notch website developer to sort the business out. I asked all the sellers on the site what they needed it to do; I told them that I needed it to be as automated as possible, so I could manage it myself …. and the upshot of that was 9 solid months of website development, starting from scratch again.


Version 2 of the WowThankYou website was launched in May 2011 – much, much better! It was still early days, but the site looked good (we were mentioned on a lot of worldwide web design sites, which was promising!) There were lots of new features – the sellers managed their own stores, the site was faster, so much more professional … but I still wasn’t entirely happy. There were still features I wanted to add, but had exhausted my funds so had to sit back and hope the site carried on getting stronger and growing … it didn’t help that all this was happening during a recession (I couldn’t have timed it any better had I tried!)The first real test of the website was the Christmas period 2011. I had held funds back for a full-on advertising campaign in lots of national magazines – but even with these in print, would we get sales? The answer was yes – we did ok … but can you hear the lack of excitement in my tone?! I guess I just expected more. I was relieved that we’d had decent sales, but at the same was disappointed that we didn’t take the world by storm. I guess I’m never satisfied! 


By Easter 2012 I had already drawn up plans for WowThankYou Version 3! The bank offered me the money to get it all underway, but I was nervous as I’ve never taken business loans out before. In the end my father in law loaned it to me – and off we set to deliver an even better website! This was launched back in August … typically just as I was going on holiday! Because of the complexity of the new features, there were teething problems, but I’m touching wood as I type this – we ‘seem’ ok now!


Version 3 has totally changed the fortune of WowThankYou. Not all features have been added as yet, but as soon as the site was made live, sales that had been trickling in started to flow – and we’ve seen some surges too! I’m hopeful of a sales tidal wave at some point – but I really cannot complain about where we’re at, right now, in November 2012. I have a website that I can manage (just about) on my own; it has a fabulous SEO-friendly design; it is full of amazingly talented designer makers; and I just find it a happy and positive place to hang out these days! We now have 972 sellers listing on WowThankYou and since this new design was launched we’ve had over 10,000 products listed. We average 6500 unique visitors every single day. We have been well received in the press too, which is hugely important and something we intend to build on during 2013.


Why have things turned around for us? It’s a good question, and I’d like to think that the answer lies in the phenomenal support that I’ve been shown by all the sellers who have probably hoped as much as myself that the site will ‘fly’! Without their constant support and advice, I wouldn’t have got this far. I still vow to keep commission rates to a minimum and to make the whole selling experience an affordable and enjoyable one. I also will continue to offer features and opportunities that the ‘more costly’ competitors offer their sellers … I have no overheads as such, other than this laptop that I am typing on, and by having an automated website that pretty much does everything for me, I don’t have the worry of thinking about staff and offices (and the costs associated with these). I believe that once you start thinking about employees and premises you have to change the way you think regarding your business, as you are committing to pay wages, rent … To me, this is when it becomes a job – and I don’t want that! I want to work from home, have the freedom to take an afternoon off – yet work late at night or during the weekend when needed – I don’t want a 9-5 job! My children (aged 6 and 4) benefit from having mummy at home all the time and we can go away on family holidays, just as long as there’s a good Wi-Fi pick up wherever we go! I firmly believe that there’s no limit as to how far WowThankYou can go – we don’t need plush offices to prove our success! Some people see this as a lack of ambition (WowThankYou has lost out on some business awards because of this I believe) – but I see this as my way of keeping my commitment to sellers of having a low costs selling platform. You’re helping me grow the site and establish the brand – why should you then pay more for the same service just because we’ve hit the big time? It doesn’t make sense to me … there’s nothing I can’t do with perhaps some ad hoc freelance assistance – we can be as successful as the best of them, but I don’t have to sit in a posh chair in a contemporary office block to achieve it! I love being part of WowThankYou – especially now it’s doing so well


Where next? Simple – more of the same, with yet more refinements. The lesson I’ve learned since those early days back in 2010 is that there will never been an end point – a website of this nature has to keep up with technology and therefore will be constantly changing and advancing. So long as the funds are in place to make the changes, the changes will continue to be made! Without giving too much away, we have plans to perhaps launch versions of WowThankYou into new markets, we are constantly looking at possible strategic alliances that will benefit the brand as well as the sellers, and we’re not frightened to think outside the box and trial new ideas. At the end of the day, sellers are happy if they get sales, and I’m happy as I get the commission to put back into the website


I’ve recently dipped my toe into the world of Blogger and have set up a blog about me … it’s not all about WowThankYou, because there is more to me than this website you know! It’s still early days and I’ve a lot to learn with how it all works etc. – but please do take a look, all nice comments will be most welcome! http://ohwowtracey.blogspot.co.uk

To end this article I’m going to tell you a secret … Earlier this year, at the time when I was putting together a business plan for bank loans, I was approached by an agent working on behalf of a large High Street organisation enquiring whether I’d be interested in selling WowThankYou. Rather thrown by the whole thing, I played it cool to find out more, and the figure they mentioned was over three times the amount that I was hoping to raise at the bank! It would have paid me back with a handsome profit, but they mentioned buying the ‘goodwill’ that I’d built with my sellers … and I didn’t like that at all. And I said NO. I have too much emotion invested into WowThankYou to see it swallowed up by a big brand, and I don’t want to see it go … so please carry on supporting me and the website, and let’s see how far we can take it together – deal? J If you are not yet a seller on WowThankYou, pop over to Creative Connections – you might just find a tempting joining promotion …


Have a great Christmas – there’s still time to buy last minute stocking fillers on WowThankYou, wink wink xxx 


Christmas Lunch; make it easy on yourself


Published in Issue 20, December 2012
Written by Gill from Personal Space Interiors

Christmas Lunch; make it easy on yourself

Being in charge of Christmas lunch can be daunting. Whether it’s your first time cooking for the family or you’re a past master, there’s always a whole lot going on and expectations, not least your own, are invariably high. I love to cook, but I know my passion isn’t shared by everyone. So to help you along, here is my guide to making Christmas lunch enjoyable to make and to eat for everyone.


First things first – get organised.
 Have a clear out – check your cupboards and freezer. Get organised and begin to use up what you have frozen so you’ll have room to store your festive foods.
 Plan ahead –Grab a coffee, and take an hour out of your day. Work out how often you will be cooking for visitors during the Christmas week, and how many people you’re cooking for on the big day. Do this at the beginning of December, if you can before all the rushing around starts. This gives you plenty of time to plan what to make and what you can do in advance to be prepared.
 Shopping lists – I love lists, perhaps a little too much, but now is the time when lists come into their own. You don’t want to have to go last minute food shopping; we all know what a nightmare that can be. Write yourself proper shopping lists well in advance and pin them up in your kitchen. You can then add to your lists as and when you need to.
Stock up on sundries – make sure you have plenty of tin foil, cling film, baking parchment, plastic containers and freezer bags. Disposable foil baking trays also make life a whole lot easier. Just think of all the washing up saved.


Christmas lunch top tips:
Don’t bother with a starter. Have drinks and some little savoury nibbles instead. Starters are just too much work, with far too much clearing up and besides, everyone’s just waiting for the main attraction anyway.
Serve two meats for the main course. I think turkey looks great but doesn’t have the best flavour and needs a little help. Goose is rich and benefits from something savoury to compliment. And it means your options for follow on recipes are much more varied, interesting and tasty.
Give goose a go. If you feel like pushing the boat out, give goose a go. It’s really easy to cook, tastes heavenly and you’ll get the best fat for your roast potatoes too.
 If you’re making Christmas lunch just for two, have Guinea Fowl. It’s just the right size, it feels a little special and above all it’s delicious! Just follow the same prep as for the turkey and adjust the cooking time accordingly.
Don’t stuff the turkey. I think it cooks better and stays moist when it isn’t stuffed as there’s less cooking time. I find the stuffing from inside the bird isn’t good to eat anyway; it doesn’t look very appetising and it can be quite greasy so I always cook my stuffing separately.
Serve a wide variety of vegetables. That way you can make sure everyone likes at least one thing and for those who don’t eat meat there’s still plenty to eat (make sure you use vegetable oil for roasting). 

Sprouts do not take 5 hours to cook. Make your sprouts sing by giving them the respect they deserve; if you don’t overcook them, they won’t smell and they’ll taste great. And if you can, buy them on the stem – kids are fascinated. 
Self-service . Put the turkey and trimmings on a serving platter, the vegetables in serving dishes and let everyone help themselves while someone carves the turkey – the food will stay hotter that way and it’s more fun and less work for you. Make sure all plates and serving dishes are piping hot to keep everything nice and warm. 
Make lots of gravy and keep some warm in case anyone wants extra, which they invariably will!
And finally, ban everyone from the kitchen until you need them! May sound harsh, but it’s better than having people get under your feet when you’re busy.


The night before - do as much of the prep as you can. You can chill out with a glass of wine, take your time and still have everything sorted in a couple of hours. It’ll save you so much time and stress the next day. And when there are visitors to see and presents to open, you don’t want to be stuck in the kitchen all day.
 First, cook the ham. You can get everything else done while the ham is cooking.
 Get the turkey or goose out of the fridge, remove the plastic coverings and giblets, dry with kitchen paper, cover loosely with a sheet of foil and leave somewhere cool overnight.
 Make the giblet stock for the gravy.
 Make the stuffing and roll into balls or place in a loaf tin ready to bake.
 Prepare the pigs in blankets and place in a foil tray ready to bake.
 Make the cranberry sauce, place in a serving dish, leave to cool and cover with cling film.
 Peel and chop the vegetables (except the potatoes and celeriac) ready to cook, pop them into freezer bags and store in the fridge.
 Remove the butter from the fridge. Room temperature butter will be much easier to deal with.
 And finally, if you can, set the table ready for dinner.

Family Christmas lunch menu for 8

Roast turkey / roast goose and mustard glazed ham served with:
Chestnut, bacon and mushroom stuffing; pigs in blankets and turkey gravy

Vegetarian option – roasted red onion, pepper and goats cheese tart served with:
Cranberry stuffed apples; figs in blankets; Cheddar, sage and onion croquettes; and rich vegetable gravy

Side dishes:
Roast potatoes and parsnips; sprouts with bacon and chestnuts; carrots with orange and thyme; celeriac puree; and broccoli and green beans with almonds and parsley
Cranberry, orange and port sauce; bread sauce

I’ll leave the desert or pudding choices entirely up to you. If you’re buying a Christmas pudding, try to get one that can be heated in the microwave. It’ll taste just as good and be so much easier.
Here’s my time plan. This is based on lunch for 8 to be served at 2.00pm.


Recipes

Mustard glazed ham

Ingredients – ham joint, onion halved with skin on, celery, carrot, bay leaves, thyme, whole black peppercorns, treacle, and mustard powder

 Place the ham in a large deep stock pot with an onion, a stick of celery, a carrot, 2 bay leaves, some thyme sprigs and a few peppercorns.
 Cover with water and put on a lid. Bring to the boil and simmer until cooked through and tender (around 2 hours for a large ham joint).
 Remove the ham from the pan and place on a baking tray double lined with strong tin foil.
 Remove the skin and most of the fat from the ham. Score the fat in a diamond pattern, sprinkle with 2 tbsp mustard powder and smear with 2 tbsp black treacle.
 Bake in a very hot oven for 15 minutes. Remove from the oven and wrap loosely in the foil.


Roast turkey 


Ingredients: turkey, unsmoked streaky bacon, butter, fresh sage, fresh thyme, bay leaves, and 2 lemons

 Place a long sheet of tin foil in the bottom of the roasting pan. Place another sheet of foil across from this one to form a large cross. Place a roasting rack on top.
 Loosen the skin from the turkey breast with your fingertips and smear the butter between the skin and the breast meat. Place a few sage leaves under the skin. Place bay leaves, sprigs of thyme and two halved lemons inside the cavity. Smear the outside of the turkey with butter and cover the breast and legs with crisscrossed streaky bacon rashers.
 Place the turkey on the rack. Bring the edges of foil together and fold over to form a loose fitting cover and put in the oven at 190oC.
 Cook as per the recommended timings depending on size. Baste the turkey every hour. Remove the foil, and take off the bacon for the last 30 mins cooking time. When ready, remove from the oven, cover loosely again with foil and leave to rest. A large turkey can happily sit for 2 hours and stay hot if properly covered.


Roast goose 


Ingredients: goose, butter, thyme, rosemary, 2 onions quartered, 2 apples quartered

 Place a long sheet of tin foil in the bottom of the roasting pan. Place another sheet of foil across from this one to form a large cross. Place a roasting rack on top.
 Prick the skin all over the goose using a skewer. Place sprigs of thyme and rosemary, and the onions and apples inside the cavity. Smear the outside of the goose with butter and cover the legs with foil.
 Place the goose on the rack. Bring the edges of foil together and fold over to form a loose fitting cover and put in the oven at 190oC.
 Cook as per the recommended timings depending on size. Turn the goose over every hour and carefully drain off and reserve the excess fat. Remove the foil for the last 30 mins cooking time. When ready, remove from the oven, cover loosely again with foil and leave to rest. A large goose can happily sit for 2 hours and stay hot if properly covered.


Chestnut, bacon and mushroom stuffing
Ingredients: 20g dried porcini mushrooms, 400g good quality sausage meat, 100g chestnut mushrooms, 100g cooked chestnuts, 100gunsmoked streaky bacon, 4 shallots, 2 garlic cloves,100g fresh breadcrumbs, fresh sage, fresh thyme, ground mace, salt and pepper

 Chop the bacon, chestnuts and mushrooms and finely chop the shallots and garlic
 Cover the porcini mushrooms with boiling water and leave to soak for 30 minutes. Then drain and chop finely.
 Sauté the chopped bacon, mushrooms and shallots until golden. Add the garlic and soften for 2 minutes. Transfer to a plate to cool completely.
 Place the sausage meat, breadcrumbs, chopped chestnuts and thyme and sage in a large mixing bowl. Season very well with salt and pepper, and add a pinch of mace. Mix thoroughly.
 Add the porcini, bacon, mushrooms and shallots and mix well.
 Place in a foil lined loaf tin, or shape into balls and place on a foil tray / baking sheet.
 Bake for 30 minutes (balls), 50 minutes (loaf). Check the stuffing is piping hot throughout.


Pigs in Blankets 


Ingredients: chipolata sausages, unsmoked streaky bacon

 Place the streaky bacon in a single layer between two sheets of cling film. Using a rolling pin, roll the bacon lengthways to stretch the rashers. Cut the rashers in half if you are using mini chipolatas.
 Wrap the bacon around the sausage and place on a baking / foil tray with the bacon edge tucked under.
 Bake for 30 minutes.


Roast potatoes and parsnips 


Ingredients: 2kg floury potatoes(I like Roosters or Desiree), 500g parsnips, goose fat or vegetable oil

 Put the goose fat or vegetable oil on a foil / baking tray and preheat in the oven.
 Peel the potatoes and cut into large chunks.
 Peel the parsnips, cut in half lengthways and then cut each half in two.
 Parboil the potatoes for 5 minutes in well salted water. Drain, and give the pan a good shake to rough up the edges.
 Place the potatoes in the hot fat, turn to coat and bake for 15 minutes.
 Add the parsnips to the tray, turn everything to coat and bake for a further 30 minutes.

Sprouts with Bacon and Chestnuts 


Ingredients: 500g sprouts, 100g unsmoked streaky bacon, 100g cooked chestnuts, butter, sherry, fresh parsley, pepper
 Parboil the trimmed sprouts for 5 minutes and drain.
 Sauté the chopped bacon and chestnuts until golden.
 Add the spouts with a splash of sherry, a knob of butter and some chopped parsley and cook for 2 minutes.
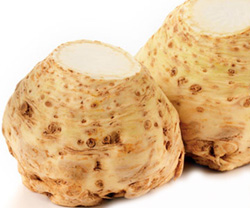

Celeriac puree 


Ingredients: I celeriac , 2 floury potatoes, whole milk, bay leaf, crème fraiche, butter, nutmeg, salt and pepper

 Peel the celeriac and cut into 2cm cubes.
 Place the cubed celeriac in a saucepan and cover with warmed milk. Leave for an hour. Drain off the milk.
 Return the celeriac to a clean saucepan along with a bay leaf. Peel and quarter the potatoes, add to the pan and water to just cover. Bring to the boil and simmer until tender.
 Drain and either press through a potato ricer or whizz with a stick blender. Add 2 tbsp of crème fraiche, a knob of butter and season with freshly grated nutmeg, salt and pepper.


Carrots with orange and thyme 


Ingredients: 500g carrots (purple, yellow, orange if you can get them), juice of half an orange, butter, fresh thyme

 Steam or boil the carrots until tender. Drain and return to the saucepan.
 Add a knob of butter, orange juice and some fresh thyme leaves.
 Pop the lid on and simmer for 2 minutes. Give the pan a gentle shake to make sure all the carrots are coated in the citrus butter.


Broccoli and green beans with almonds and parsley
Ingredients: 1 head of broccoli, 200g green beans, 50gflaked almonds, lemon juice, fresh parsley

 Toast the almonds in a dry pan until golden
 Steam the broccoli and beans until just tender, drain and place in a warmed serving dish
 Sprinkle with the toasted almonds, a squeeze of lemon juice and fresh chopped parsley

Cranberry, orange and port sauce 


Ingredients: 200g fresh or frozen cranberries, zest of an orange and juice of half an orange, 50g light soft brown sugar, 50ml port
Place all of the ingredients in a small heavy based saucepan.
 Simmer gently until the cranberries begin to burst and reduce to a syrupy consistency.
 Carefully taste the sauce and add extra sugar if needed, stirring gently until the sugar dissolves.


Bread Sauce 
Ingredients: 400ml whole milk, 1 onion, 6 cloves, bay leaf, whole black peppercorns, 100g fresh breadcrumbs, 15g butter, 1 tbsp crème fraiche, mace, nutmeg, salt and pepper

 First infuse the milk; simmer gently in a saucepan with a peeled onion studded with cloves, a bay leaf and peppercorns. Set aside to cool, then remove the onion and seasonings.
 Pour the infused milk into a clean saucepan and add the breadcrumbs, a pinch of mace and a pinch of freshly grated nutmeg.
 Simmer gently until the sauce thickens.
 Whisk in a knob of butter, a tbsp of crème fraiche and season well.


Turkey gravy


Ingredients: turkey giblets, an onion, a stick of celery, a carrot, 2 bay leaves, fresh thyme, whole black peppercorns, 150ml white wine, 1 tbsp plain flour, half a chicken stock cube, 1tbsp redcurrant jelly.

 Place the giblets in a large sauce pan with the vegetables, herbs and peppercorns. Cover with water, bring to the boil and simmer for at least an hour. Strain into a jug.
 Skim off the fat from the turkey roasting tray, leaving around 2 tbsps in the tray.
 Place over a medium heat and whisk in the flour and stock cube to form a paste.
 Whisk in the wine to loosen the paste and gradually whisk in the stock.
 Whisk in the redcurrant jelly and stir over the heat until the gravy thickens. Let it simmer for 5 minutes then add more stock as required.


Roasted red onion, pepper and goats cheese tarts
Ingredients: 500g block or sheet all butter puff pastry, 500g red onions, 2 roasted red peppers(from a jar), 2 goats cheese logs, butter, olive oil, fresh thyme, 1tbsp light soft brown sugar, 100ml port , and black pepper.

 Peel the onions, halve and slice finely. Place in a pan with a little olive oil, a knob of butter and the sugar. Cover and leave to soften over a low heat for around 10 minutes. Add the port and continue to simmer until reduced to a marmalade consistency. Leave to cool.
 Open out the peppers and cut out rounds using a 10cm cutter and cut the goats cheese logs into 2cm slices.
 Roll out the pastry to 5mm thickness .Cut into rounds using a 15cm cutter and place on a baking tray lined with baking parchment. Save the pastry scraps for the figs in blankets.
 Put a generous spoonful of the red onion marmalade on each pastry round and spread evenly leaving a 1cm gap around the pastry edge.
 Place a pepper round on top of the onion marmalade, and add a slice of goats cheese
 Sprinkle with some fresh thyme leaves, season with black pepper and drizzle with a little olive oil.
 Bake in a 200oC oven for 15-20 minutes until the pastry is risen and golden brown


Cranberry stuffed apples 


Ingredients: 1kg braeburn apples, 100g dried cranberries, zest and juice of half an orange, 2 pieces of preserved stem ginger finely chopped plus 1 tbsp of the syrup, pinch of ground ginger, pinch of cinnamon

 Place all of the ingredients except the apples in a saucepan over a medium heat. Simmer until the cranberries plump up and the liquid is almost evaporated.
 Core the apples and run a knife around the “equator” of the apple to split the skin.
 Place in a foil lined baking dish and stuff each apple with the cranberry mixture.
 Bake for around 30 minutes until the apples are soft.


Figs in blankets


Ingredients: puff pastry scraps, fresh figs, maple syrup, small piece of stilton, walnuts

 Roll out the puff pastry to 5mm thickness and cut into 2cm strips
 Cut a deep cross into the top of each fig and squeeze the base to open up the fig.
 Place the opened figs on a foil lined tray and wrap a pastry strip around each fig.
 Put a cube of stilton and a walnut into the top of each fig and drizzle with maple syrup.
 Bake for 15-20 minutes until the pastry is golden.


Cheddar, sage and onion croquettes
Ingredients: 400g mashed potato, 100g grated strong cheddar cheese, 1 onion finely chopped, knob of butter, 2 tbsp fresh chopped sage, salt and pepper, 2 tbsp seasoned plain flour, I beaten egg, 50g breadcrumbs,2 tbsp freshly grated parmesan, 2tbsp olive oil

 Fry the onion in the butter until golden and place in a mixing bowl.
 Add the mashed potato, cheese and 1 tbsp sage. Season well and mix thoroughly.
 In a small bowl mix the breadcrumbs with the parmesan, olive oil and 1 tbsp sage.
 Shape potato mix into chunky sausages around 10cm long. Coat each sausage in seasoned flour, then beaten egg and finally the breadcrumb mix.
 Put the croquettes on foil lined baking tray and pop in the fridge for 30 mins to firm up.
 Bake for 30 mins until golden brown and crisp.


Rich vegetable gravy
Ingredients: I onion finely sliced, knob of butter, 1 tbsp oil, 1 tbsp plain flour, vegetable stock, sherry, redcurrant jelly

 Fry the onion in the butter and oil in a covered pan until golden brown. Whizz the onion with a stick blender to a puree.
 Place the pan back over a medium heat and whisk in the flour to form a paste.
 Whisk in a splash of sherry to loosen the paste and gradually whisk in the stock.
 Whisk in the redcurrant jelly and stir over the heat until the gravy thickens. Let it simmer for 5 minutes then add more stock as required.

I hope you enjoy my recipes. Why not follow my blog for other festive foodie treats


Best Craft Markets and Craft Shops in Europe


Published in Issue 19, October 2012
Written by Polly Allen

Best Craft Markets and Craft Shops in Europe


E
urope is full of inspiration for crafters, from the beautiful festive markets in November and December to the eye-catching local products that you just have to bring back home as souvenirs. Here are some of the best destinations to give you some great ideas.

Christmas Markets

Berlin has some of the longest-running markets, typically from the end of November until New Year’s Eve, meaning there’s plenty of time to browse through glass ornaments, wood carvings and old-fashion toys on the stalls. Christmas trees are a German tradition so there’s no better place to get into the spirit than to visit the 20ft tree at the Kaiser Wilhelm Memorial Church market.

 A Christmassy visit to Prague wouldn’t be complete without seeing Wenceslas Square, where one of the bigger markets takes place. Yes, Prague was the home of the famous Good King Wenceslas from the carol, and it’s also where you’ll find the city’s iconic puppets and marionettes – one of the best craft gifts you can bring back for children.

Austria is another popular choice, with Vienna and Salzburg boasting a wide array of stalls and several warming treats on offer such as mulled wine, waffles and sweet hot chestnuts. Vienna’s Schönbrunn Castle makes an incredible Baroque backdrop for bargain-hunting for tree decorations and themed presents from the end of November. Meanwhile Salzburg’s market in front of the Cathedral is open until 9pm on Fridays and Saturdays in 2012 and there will be choirs to entertain you with festive songs.

Essential Local Crafts


Cyprus has many traditions but its lace-making is definitely worth witnessing in person. The village of Lefkara is where you’ll see lace being made by hand, as it has been for centuries. Needlework in general is popular on the island and you will have plenty of choice when it comes to embroidered souvenirs and linen goods.


 The Algarve might be more readily associated with golf than with handicrafts, but the town of Porches is a golf-free zone where pottery is king. You might notice that many of the houses in the region have blue and white tiles, or azulejos, adorning them: why not buy your own and ask the potters to customise it? Porches Pottery is just one of the outlets where you can have your purchases personalised during an Algarve holiday. Popular Portuguese designs include lemons and local scenery.


The humble espadrille is something of a summer wardrobe staple, but did you know that it’s a traditional choice of footwear for people from Majorca in Spain?  It’s easy to pick up a pair of espadrilles in local market ssuch as those at Manacor and Son Servera, or even in the smart shopping streets of Palma City. Look out for alpargatas (which are made with rope) and abarcas (which have a strap and leather detail). 

Craft Shops

Florence is one of the best places in Europe to pick up leather goods. The Santa Croce workshop certainly won’t disappoint when it comes to finding anything made of local leather. Meanwhile if you want inspiration for jewellery designs then head to the Ponte Vecchio Bridge to find decorative pieces, though they often come with a hefty price tag. 

On a city break to Lisbon you should make a beeline for the Baixa District, which is full of haberdasheries, bead shops and other independent shops. In the more commercial Chiado District it’s hard to avoid the draw of the Retrosaria (which means haberdashery) in the Rua do Loretto, but the shop isn’t very well advertised so keep your eyes peeled! As with the Algarve, you should also be looking out for azulejos on the buildings.

Copenhagen is ideal for crafting fanatics and you can see an all-female metalworking collective if you visit the Kvindesmedien at Christiania in the city.  If you’re stocking up on basic materials like ribbons, paper and card decorations then Panduro, in Nørre Farimagsgade, will be right up your street. 

It really is worth looking beyond the local high street when it comes to tracking down handicrafts. Whether you’re looking to stock up on seasonal treats at European Christmas markets or you want to watch craftspeople at work, there’s something to suit everyone. 


In the Spotlight with Mr X Stitch


 Published in Issue 19, October 2012
Written by Mr X Stitch


Jamie Chalmers, also known as Mr X Stitch is on a mission is to bring the world of cross stitch and embroidery to a whole new audience.He has been cross stitching for years and really believes in the benefits of stitching, both from a relaxation and a sustainability perspective.
Many of you may have seen Jamie on ‘Kirstie’s Handmade Britain’.

Each issue, Jamie introduces us to a fascinating member of the crafting community. If you have missed out on any of Jamies interviews you can find them online for FREE from the Creative Crafting website back issues page.


This issue I am pleased to present Erin Riley – super weaver!

Name: Erin M Riley

Medium: Tapestry


What’s your story?I am a Scorpio, a middle child, I’m vegan. Oh, I went to art college for fibers in Boston, Massachusetts where I learned to weave freshman year and never stopped weaving since. I went to graduate school and kept weaving tapestries and since then I have continued weaving and making new work. My technique is always changing and hopefully getting better as I grow as a weaver and artist. I have been pretty obsessed with traumatic events, drug use and the issues that surround growing up as a woman who didn’t have a father figure. My work touches on many issues, but I believe they all go together.


What’s your favourite piece of work thus far? So far I would have to say my favorite is Passed Out from 2011. It’s just the right amount of sad that I love.


What do you find challenging? Making work on the same theme over and over again, I think it’s somewhat necessary to touch on the same things and learn something from each new piece but I tend to want to rush through and move on to a new subject. I am working on doing more similar pieces.


Any advice for newbies? Don’t give up! Be positive and try to find the resources that are out there for artists.


Christmas Angel Ornament


Published in Issue 20, December 2012
Written by Sally - Jo from The Bead Bounty


www.thebeadbounty.com


Christmas Angel Ornament 


This sweet little ornament that measures approximately 3 and a half inches from head to toe, will make a great gift, or a pretty addition to your own Christmas tree.


You will need
10g of good quality size 8 seed beads
1 x 8-10mm facetted oval crystal bead for the head
2 x 15-16mm dagger beads for the feet
2 x 6mm drop beads for the hands
2 x flower beads for the cuffs
1 x 14mm decorative bead cap for the head
21 x 6mm twisted bugle for the legs
Waxed beading thread (i.e. Nymo)
Bead needle
Scissors
Bead mat or good surface for working with small beads


Instructions

Step 1. With approximately 1 metre of thread on needle pick up 2 size 8 seed beads and position them on the thread with about a 6 inch tail remaining. 

Step 2 & 3. Pass the needle back through the beads and position the beads alongside each other with the holes showing.

Step 4 & 5. Pick up another bead and pass the needle through the previous bead and then back up through the newly added bead.
Pick up another bead and add it in the same way making sure that each bead sits alongside the last with the hole showing (this is called Ladder stitch)

Step 6. Keep adding beads in the same way until you have a row of 15 beads.

Step 7 & 8. Second row - Pick up a bead and pass the needle through the thread between the first two beads on the previous row and then back up through the new bead. This bead should now sit, with its hole showing, between the first two beads on row one.

Step 9 & 10. Pick up another bead and pass the needle through the thread between the next two beads on row one and then back up through the newly added bead. This bead should sit alongside the first bead with its hole showing.

Step 11. Continue to add beads in the same way until you have 14 beads. This is called Brick stitch.

Step 12. Row 3 add 13 beads, row 4 add 12 beads, row 5 add 11 beads etc. Continue to add rows, decreasing by one bead each row until you add the last bead at row 15 and you have created a triangle. 

Leave the excess thread to use again later in the pattern. Repeat steps 1-8 to make a second triangle.


Step 13 - 18 Sew the two triangles together down each side by going up 2 beads at one side and down 1 at the other making sure to keep them in line with each other. Leave the bottom open.


Step 19 - 21. Attach the head by picking up the facetted bead, bead cap and a seed bead. Pass the needle back down through the bead cap and facetted bead bypassing the seed bead as this acts as the anchor for the head. Pull the thread tight so that the beads sit snugly next to the triangle and pass the needle through several beads to fasten it off. You can add some thread or thin ribbon to the seed bead at the top of the head later to hang the ornament from your tree.

Step 22. For the wings, bring an anchored thread out of the middle bead on the 4th row down from the head, pick up 16 beads and secure them in a circle. Pick up another 16 beads and anchor them at the other side making a figure of eight.

Step 23 - 25. For the arms, bring an anchored thread from the side of the triangle where you want the arms to start, pick up 1 seed, 1 twisted bugle, 1 seed, 1 twisted bugle, 1 flower bead as a cuff and a drop bead as a hand.

Pass the needle back up through all of the beads except the drop as this acts as anchor. In the same way as the head, pull the thread tight so that the beads sit snugly against the triangle. Pass the needle through several beads on the triangle so that the thread emerges at the opposite side to add the second arm and repeat for the 2nd arm.

Step 26 - 27. Bringing a secure thread from the inside top of the triangle pick up 4 twisted bugle, 1 seed, 4 twisted bugle, 1 seed and 1 dagger bead. Pass the needle back up all except the dagger (this acts as the anchor) and pull the beads up tightly to the top of the triangle and secure. Pass the needle back down inside the triangle and repeat for the 2nd leg but this time add 5 twisted bugle beads instead of 4 in the first group, this makes the 2nd leg a little longer than the first.


Please note: This is a very versatile little ornament. You can hang it from your tree, sit it on your mantle piece or wear it as jewellery i.e. a brooch or necklace.


If you wish to purchase the bead kit at £6.95 (which includes all the beads with needle and thread to make 1 ornament) please visit www.thebeadbounty.com. When you purchase the kit the pattern will be sent digitally via email. 


Millie - Mae & Mummy Makes... A Gingerbread House

Published in Issue 20, December 2012
Written by Tracey from WowThankYou


Millie - Mae & Mummy Makes... A Gingerbread House

I made a house of gingerbread

It was so sugary sweet
It took me all day long to make
But, it lasted just a week.
Monday I ate the ceiling.
Tuesday I ate the door.
Wednesday I ate the windows.
Thursday I ate the floor.
Friday I ate all four walls.
Saturday I ate the lawn.
Sunday I licked up all the crumbs.
My gingerbread house is gone!


I have never, in my 40 years, made a Gingerbread House – so this was an easy project to pick to do with Millie-Mae. 


If you are considering having a go yourself, make sure you have plenty of time and can be patient – there’s a lot of waiting around for icing to dry! 


Ingredients
175g butter
175g soft dark brown sugar
3 tbsp golden syrup
700g plain flour
1½ tsp bicarbonate of soda
2 tsp ground ginger
2 tsp mixed spice
1 tsp ground cinnamon
Zest and juice of 1 orange
2 medium free-range eggs


For the decoration
Boiled sweets for the stained glass windows (we used rhubarb and custards)
500g box royal icing sugar, made up nice and thick
Long ‘straw-like’ chews for windowsills
Liquorice comfits for the shutters
A LOT of white chocolate buttons for the roof tiles (I bought 14 bags of Cadbury ones!)
Hundreds-and-thousands for the chimney (though our chimney didn’t survive!)
Jelly beans, sprinkles, other sweets for decoration

Method

1. Put the butter, brown sugar and golden syrup into a pan over a very low heat, stirring until the butter and sugar have melted. Set aside to cool.


2
. Mix the flour, bicarbonate of soda, spices and orange zest in a big bowl. Crack the eggs into another bowl.


3.
Add the butter mixture to the flour along with the eggs and orange juice. Mix well, then use your hands to bring together into a ball. Sprinkle a little flour over a clean work surface and knead the dough for a few minutes until smooth. 


4. Preheat the oven to 180°C. Divide the dough into 3 pieces and roll out on to sheets of baking paper. Roll until the gingerbread is about the same thickness as a £1 coin.
Templates: I cheated and printed one from the deliciousmagazine website. Cut out the different pieces (re-rolling the trimmings), then transfer the gingerbread shapes, still on their baking paper, to 3 baking sheets.
Put boiled sweets in each window hole (they will melt in the oven and create a stained-glass effect), then bake for 9 minutes.


5.Carefully slide the gingerbread (still on the baking paper) onto a cooling rack. Leave to cool, preferably overnight.


6
. To decorate the house use royal icing to stick on the chew ‘straws’ windowsills and use the liquorice comfits for the shutters. Set aside to set.


7.
We assembled our house on a cake board, but a chopping board will give you more garden! Use royal icing to stick the sides, front and back pieces together, and stick the pieces to the board to stabilise the house.


8. Decorate one roof piece: use a knife to spread icing all over the roof, then cover with white chocolate buttons. Start from the bottom adding the buttons in rows that just overlap to look like tiles.


9. Decorate the chimney pieces with icing and hundreds-and-thousands. Wait until the icing is completely dry – we didn’t and it collapsed … so we left it off!
Brush or pipe the icing onto the sloping edges of the front and back of the house to create ‘icicles’. Attach both roof panels, using royal icing, making sure you spread some icing in the middle to glue them together. Stick the chimney pieces together, then attach to the roof with royal icing. Carefully cover the untiled side of the roof with white chocolate buttons in the same way as before. Attach the door to the house and choose a sweet for the door knob.


 I have no idea where to store it, no idea how long it will last … but it’s one pretty cool Christmas decoration! Millie-Mae’s nana visited earlier and she thought it was amazing! It was a really fun project to do, although it did take, on and off, a whole weekend. I must leave the last words to Millie-Mae herself when she announced “that has got to be the best thing I’ve ever seen in my whole life” …

Merry Christmas xxx