How To Make An Easter Bunny Brooch
Published in Issue 22, April2013
Written by Nicola from Cutie and the Feast
A needle felting mat or piece of foam (you can also use a clean washing up sponge)
Approx 40g of wool roving in your main colour
A small amount of black and pink wool roving
Some thin (5mm) double-faced satin ribbon
Small scissors
Needle and thread
Felting needle, ideally one 38 gauge and one 40 gauge but if you just have one then either will be ok. A 38mm brooch finding
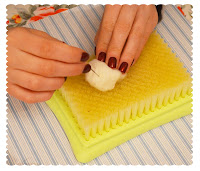
 Step 1. To start take a piece of wool roving in the main colour of your bunny and roll between your hands into a ball. You want the ball of wool roving to be a bit bigger than your finished brooch. If in doubt start with a smaller piece and then add to it until you get the size that you want.
Using the 38 gauge needle start to jab at the wool. As you jab you will notice that the fibres start to knit together.
You will want to create a disc shape that is flat on the back and slightly rounded to the front. To do this start to jab on the sides of your wool until you get a nice even shape.
Step 2. Once you have your basic head shape it’s time to add a bunny nose.
Take a smaller piece of wool roving and make a small ball. Position this towards to bottom of the face in the middle (where a bunny nose should be) and use your 38 gauge needle to jab the wool. The wool roving will knit together with the main part of the brooch.
If you aren’t sure how much wool to use add a small amount at a time, its easy to add more but very difficult to take it away.
Step 3. Next, make the ears. Take a piece of wool roving and roll into a sausage shape. Jab at the wool until your ears become firm. Leave one end of your ear un-jabbed, you will use this fluffy bit to attach the ear to the bunny head.
Make two ears in the same way and try to get them even, then take a small piece of pink wool roving and jab into the middle of each ear.
Step 4. Now attach each ear to the bunny using the tufts at the base of the ear. Using the 38 gauge needle jab into the head and also through the ear.
Nearly there, your bunny just needs some personality!
Step 5. Using your smaller 40 gauge needle add small pieces of black wool roving, for the eyes and mouth, and a small amount of pink or peach wool roving for the nose.
Tie a bow out of your ribbon and fix to the bunny using a needle and thread.
If you like you can also give your bunny some whiskers. Take two strands of thread or embroidery floss and thread through a needle, then pass the needle through the nose of you bunny. Don’t pull the needle all the way through so that some of the thread is on the other side and the length that you want your whiskers to be, then snip off your thread so that the whiskers are even on each side.
Finally if you would like to wear your bunny, add a brooch back. It’s really easy to add, take a small piece of wool roving in the same colour as your bunny and jab over the top of the brooch finding into the bunny making sure to jab in between the holes of the finding and close to the edge.
Ta Dah! You are finished and have a cute little bunny to wear for Easter.


No comments:
Post a Comment